

Personalized keychains merge everyday usefulness with moments worth treasuring. Slip one into your pocket, and you’re carrying more than metal—you’re holding onto memories, messages of love, or even a subtle nod to your brand.
Why Personalized Keychains Matter
Whether it’s a little anniversary surprise or branded swag at a trade show, custom keychains leave an impression. They spark a smile each time someone grabs their keys, and they fit neatly into any promotional or gift-giving budget.
- They conjure nostalgia whenever you reach for the keys.
- They keep logos visible without feeling overbearing.
- They invite hands-on creativity, turning hobbyists into mini-entrepreneurs.
Emotional Impact And Brand Recall
Imagine gifting a simple engraved fob to celebrate ten years of marriage—it can unlock a flood of fond memories. At corporate mixers, attendees tend to hang onto logoed keychains for months, keeping your name in front of them long after the event ends.
Market research underscores this momentum. By the mid-2020s, the global personalized gifts market topped 28–31 billion dollars. Within that, keychains are forecast to rise from 2.5 billion in 2026 to 4.2 billion by 2035, maintaining roughly a 7% annual growth rate. Read the full research about keychain market growth.
Keychains Market Growth Data
Below is a snapshot of how the numbers stack up:
| Market Segment | Market Value | Projected CAGR |
|---|---|---|
| Personalized Gifts | 28–31 billion USD | 5–8% |
| Keychain/Pendant Segment | 2.5 billion → 4.2 billion USD | ~7% |
This steady climb highlights why custom keychains are more than knickknacks—they’re an expanding slice of the gifting and promotional world.
Real-world examples show weekend crafting sessions morphing into profitable side hustles:
- Etsy sellers (https://www.etsy.com) weaving in local flair to stand out
- Couples opting for matching sets to mark engagements
- Parents engraving names for reunion keepsakes
Design Directions Based On Trends
Let emerging tastes guide your material and style choices:
- Classic metal engravings deliver that timeless appeal
- Acrylic blanks printed in bold tones catch the eye
- Resin-filled molds preserve tiny photos in three dimensions
“A thoughtful custom keychain can become a daily reminder of someone special.”
Armed with these insights, you’re set to gather materials and dive into step-by-step DIY techniques. In the next section, we’ll walk through everything from photo prep to finishing touches.
You might be interested in learning more about photo projection keychains in our helpful comprehensive detailed guide at Hidden Forever personalized photo key chains.
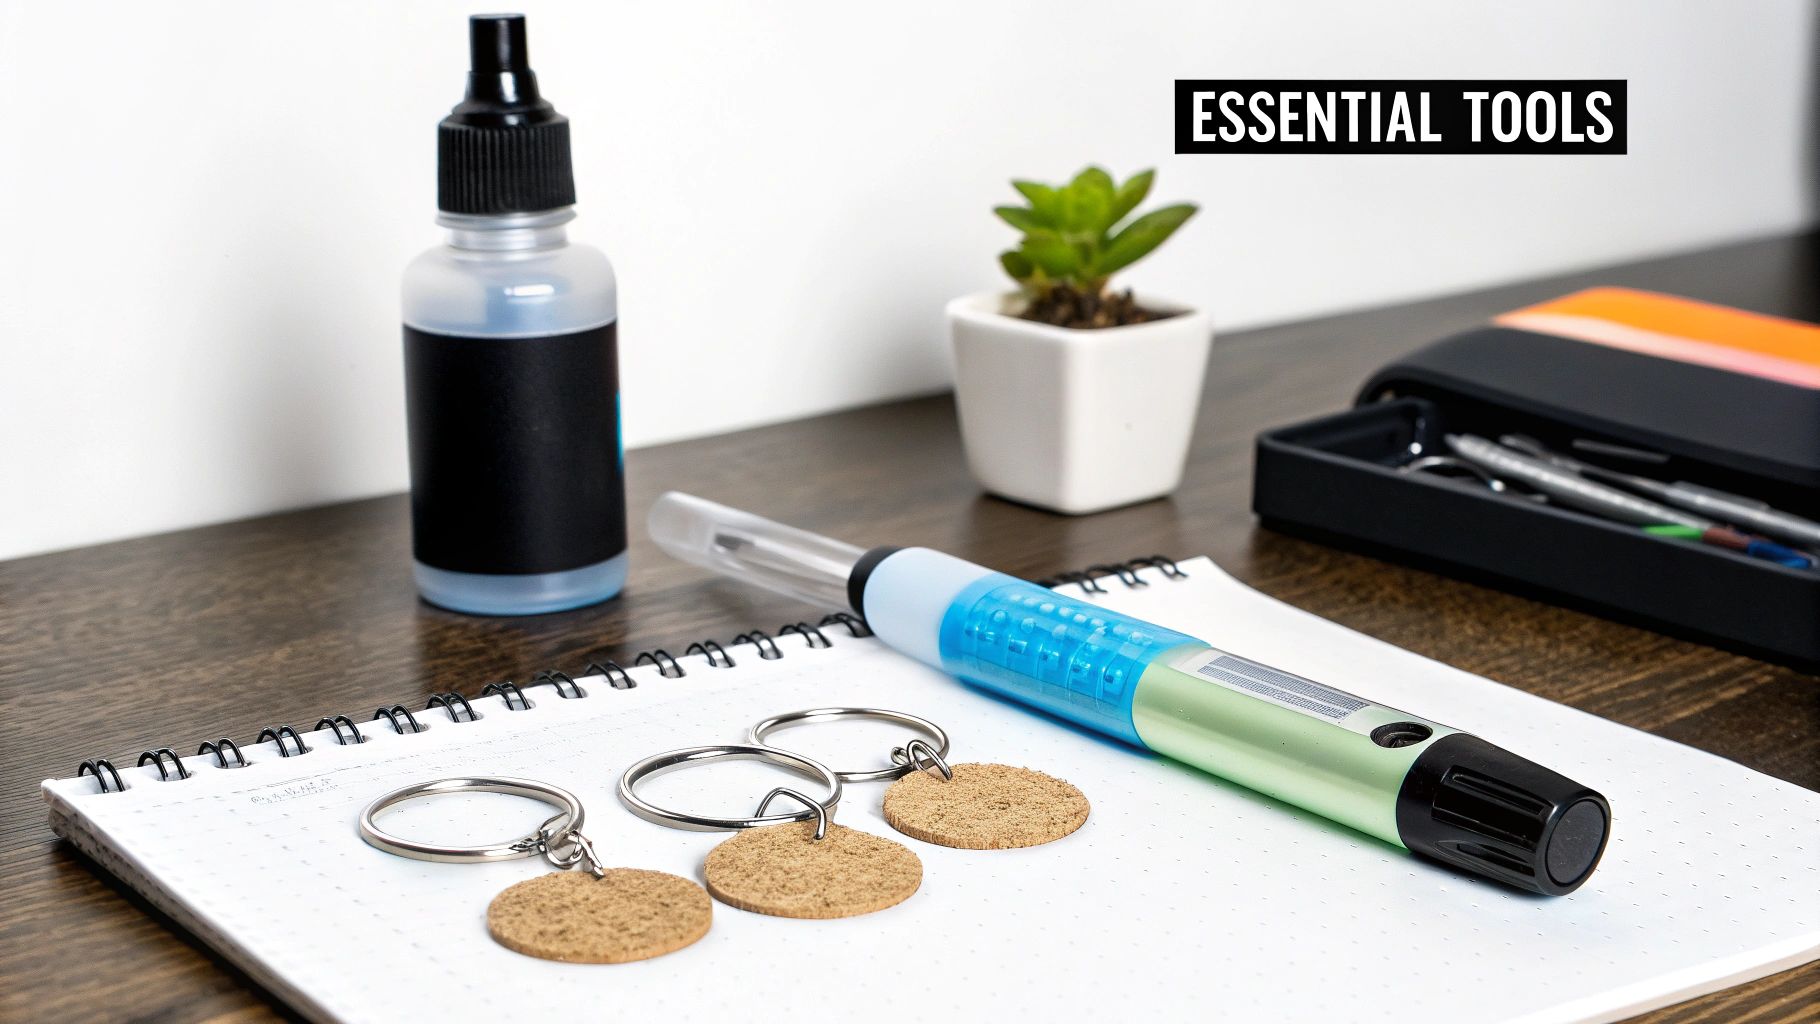
Gather Materials And Essential Tools
Getting everything in place before you dive in makes the creative process smoother and keeps costs predictable. Start by sketching the styles you want and matching them to your budget.
A handful of blanks, plates and frames gives you the flexibility to experiment without scrambling mid-project.
Here’s a quick look at popular material choices:
- Acrylic Blanks: Transparent or colored sheets perfect for crisp prints and laser engraving
- Resin Molds: Silicone forms that let you suspend pigments, glitter and tiny keepsakes
- Metal Plates: Stainless steel or zinc alloy pieces ready to engrave or stamp
- Multifunction Designs: LED-lit or bottle-opener keychains for an extra dash of fun
Essential Tools And Techniques
A few reliable tools turn a home setup into a mini workshop. You don’t need a factory’s worth of gear to get professional results.
- Fine-grit sandpaper to smooth edges and remove burrs
- Engraving pens with adjustable tips for precise lettering
- UV lamps that cure resin in minutes, not hours
- High-strength adhesives formulated for both metal and plastic
- Smartphone macro lenses—an inexpensive way to spot resin bubbles before curing
A simple macro lens trick can catch those ghost bubbles and save a piece from looking amateurish.
Quality Checks And Cost Insights
Inspecting materials as they arrive prevents headaches later. You’ll avoid wasted effort—and wallet shocks.
Commodity acrylic or soft PVC blanks can run under USD 1–3 per unit wholesale, while premium engraved metal or multifunction models often sit around USD 3–12, with retail prices stretching to USD 10–30+. That gap highlights where your margins live.
Quality checks upfront save rework time and money.
Pull out calipers to confirm thickness. Always test a drop of adhesive on a scrap piece before full assembly.
Material Options And Pricing
Before placing a big order, side-by-side cost comparisons help you decide which materials fit your plan.
| Material | Wholesale Cost | Retail Price |
|---|---|---|
| Acrylic Blank | $1.00–$2.50 | $3.00–$8.00 |
| Resin Kit | $2.00–$4.00 | $6.00–$12.00 |
| Metal Plate | $3.00–$6.00 | $10.00–$20.00 |
| LED Keychain | $5.00–$10.00 | $15.00–$30.00 |
Use this snapshot to forecast expenses and set retail price tiers that leave room for profit.
Budgeting And Sourcing Tips
Finding the sweet spot between cost and quality often comes down to a few smart moves.
- Order sample packs to trial new materials without a huge commitment
- Check supplier MOQs (Minimum Order Quantities) before you click “buy”
- Hunt for free-shipping thresholds or first-time discounts
- Don’t hesitate to negotiate better per-unit rates on larger runs
You might enjoy diving deeper into refining metal quality in our guide on Define 925 Sterling Silver.
Assessing Shipping And Bulk Discounts
Cheap unit prices overseas can be tempting, but factor in transit times and duties. Sometimes a slightly higher price from a local vendor pays off with faster delivery and better communication.
- Account for customs fees when tallying final costs
- Compare transit estimates to keep your schedule on track
- Consolidate shipments to unlock tiered discounts
Longer lead times can be worth it if margins justify the wait.
Personal Hacks To Speed Workflow
Little studio tweaks can shave minutes—or even hours—off your build time.
- Mask engraving areas with painter’s tape to avoid slips
- Test a small resin pour under UV light to dial in color consistency
- Slip on heat-resistant gloves when demolding hot or chemical-heated parts
A small workflow adjustment can shave minutes off each piece.
Bulk Versus Small Batch Purchase
Deciding on order size is all about balancing risk and reward.
- Small-batch runs let you gauge customer demand without tying up capital
- Bulk orders make sense for best-sellers and steady clients
- Track sales trends to know which items merit larger runs
Supplier Verification And Reviews
Reliable suppliers are the backbone of consistent output.
- Scan reviews and ratings before placing big orders
- Ask for real photos of production batches to see actual color and finish
- Request a sample timeline to ensure they can meet your deadlines
Verifying suppliers early reduces the risk of delays and defects.
Budget Planning To Avoid Surprises
Outline every expense—materials, tools, shipping, packaging and marketing.
- Use a simple spreadsheet to compare estimated vs. actual costs
- Build in a 10–15% buffer for unexpected fees
Staying organized from the start helps you stay profitable to the finish.
Prepare Photos And Design Your Keychains
I usually kick things off by digging through my favorite shots—those crisp, high-resolution images that really capture a moment. When you’re working on something as small as a keychain, simplicity is your friend. A clean silhouette and good contrast make all the difference once everything’s scaled down.
- Pick photos with an obvious focal point so nothing looks crowded.
- Use backgrounds that enhance your subject rather than compete with it.
- Always shoot or scan at 300 DPI minimum for the sharpest prints and projections.
Over the years I’ve bounced between GIMP, Canva, and Illustrator, depending on the project. The free apps handle quick fixes like cropping and exposure. When I need precise layer control, I dive into a premium editor.
Test Background Removal
Getting rid of busy backgrounds helps your subjects stand out, especially on colored or clear acrylic. AI tools can be great for rough cuts, but I always refine the edges by hand in a vector editor. The extra minute of tweaking pays off when you see crisp engraving lines.
Key Takeaway Clear outlines make engraving and projection pop.
I’ve found that minimal line art around faces works wonders for anniversary gifts. For family keepsakes, bold color fills and playful compositions bring a smile every time. Corporate logos? Stick to high-contrast black and white. And don’t let text creep too close to the edges—short names and dates are all you need.
Mockup And Font Selection
Before you commit, mock it up. That’s where you’ll check how your design scales and whether your chosen typeface still reads clearly near the ring hole. Here’s a quick rundown:
| Shape | Best Use |
|---|---|
| Round | Portraits, monograms |
| Rectangle | Landscapes, logos |
Script fonts feel romantic, while sans serif keeps things clean. I always move text away from corners and drill holes so nothing gets chopped off. Trending shapes like hearts, stars, and hexagons add a fun twist—just remember to leave breathing room around your focal point.
Next up, size your file precisely for laser cutting or printing.
Export And Final Adjustments
Export in PNG or SVG to keep transparency intact. Double-check your margins and bleed settings so nothing gets cut off.
Recent search interest for personalization-ready accessories like keychains reached all time peaks, and trade platforms report 13–40% year over year jumps in related queries. Discover more insights about personalized accessories on ASI Central.
Before cropping precious memories, explore best practices for restoring scans. Learn more about preserving old photos in our guide: How To Preserve Old Photos
Your final artwork should slide neatly into molds or frames without stretching. That attention to detail prevents any frustrating misalignment during engraving or projection.
Design Mistakes To Avoid
It’s easy to jam too much into a small piece. Tiny fonts vanish under dim light, and low-contrast palettes blur on curved surfaces.
- Don’t tuck text next to ring holes.
- Limit your palette to three shades max.
- Always test prints on blank shapes before a full run.
I once ran a quick resin cast and caught a fine-print disaster before it went live. A simple prototype saved the day.
A Quick Case Study
A small Etsy seller noticed her acrylic charms were hard to read. She switched to a bolder font, simplified the backgrounds—and saw a 25% bump in sales within a month.
Next Steps For Your Keychains
Once your mockups look perfect, decide whether you’ll print, engrave, or order projection services online. Keep in mind that colors on screen rarely match the final product exactly.
Always request a sample proof before placing a bulk order.
One physical sample can reveal hidden flaws and keep your budget intact. Match your digital files precisely to the provider’s mold specs or printer templates, and you’re set.
Now you’ve prepped your photos and polished your design—you’re ready to bring those personalized keychains to life.
Design Tips For Occasions
Tailor your aesthetic to the event at hand:
- Anniversary Gifts: Elegant, minimal portraits in pairs.
- Family Keepsakes: Bright frames with each name front and center.
- Corporate Giveaways: Sleek logos in high-contrast monochrome.
DIY Assembly And Customization Techniques
Engraving metal plates with a fine-tip precision pen brings a handcrafted polish to every keychain. You don’t need a bulky machine—just a steady hand and consistent strokes to carve dates, initials or simple illustrations into stainless steel. It’s an ideal setup for small workshops and home crafters.
Working with resin requires a gentle touch. Waterproof pigments blend into clear resin best when mixed slowly, avoiding cloudiness. Pour your mixture in layers and tap the mold lightly to release any trapped air bubbles.
Embedding a tiny photo turns a keychain into a pocket-sized keepsake. Once the resin cures, your image floats inside like a miniature frame—letting your loved one carry a cherished moment wherever they go.
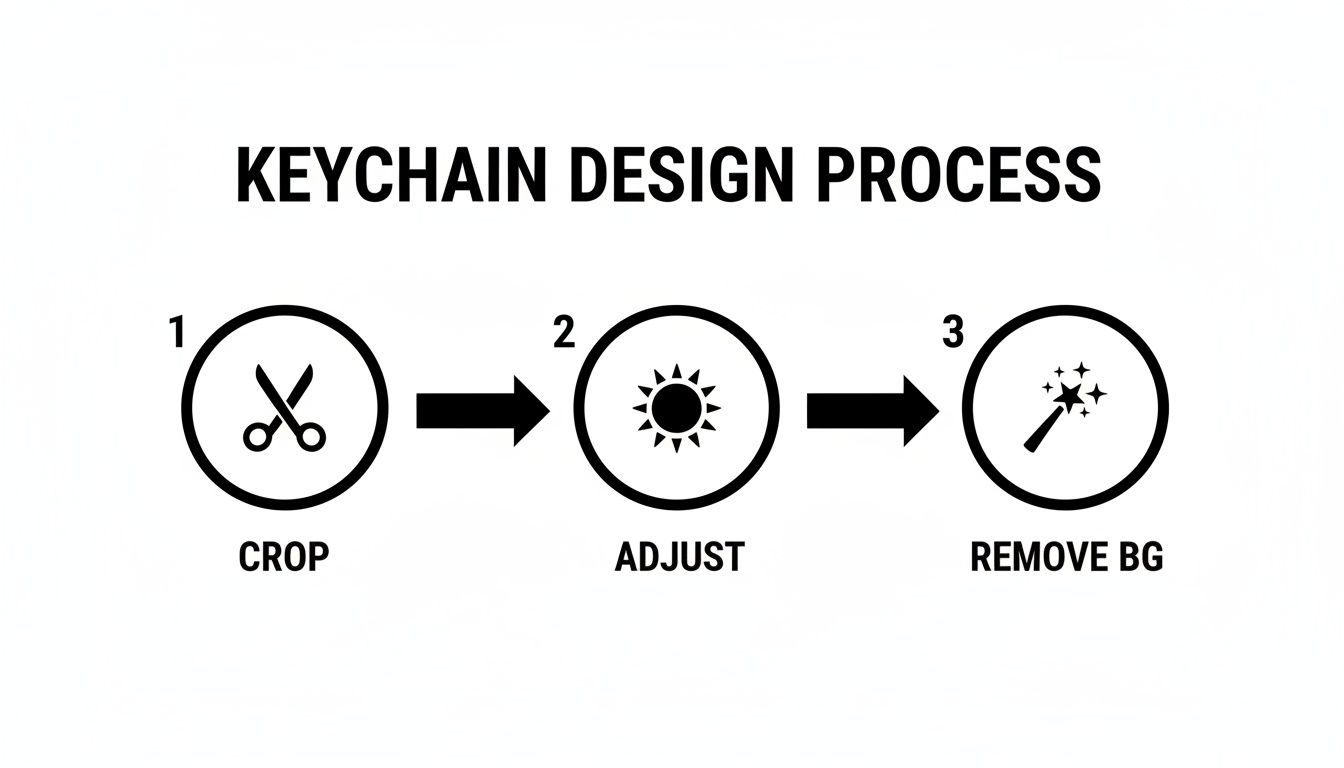
That infographic lays out the editing flow—Crop (✂️), Adjust (☀️), Remove BG (🪄)—so you get sharp, high-contrast prints on a small surface.
Engraving Metal With Precision Tools
A reliable toolset is the foundation of crisp engraving.
- Fine-tip engraving pens with adjustable depth settings for clean, consistent grooves
- Zinc alloy or stainless steel blanks that resist bending under pressure
- Painter’s tape to mask off areas and avoid stray scratches
Pro tip: Mask the edges before you carve. A fellow crafter cut her mistakes in half by switching from freehand to guided stencils.
“Switching to a depth-adjustable pen cut my error rate in half,” says Sam, a weekend crafter.
After engraving, smooth out burrs with 400 to 600 grit sandpaper, buffing in one direction. Finish with a microfiber cloth to reveal a bright, reflective sheen.
Mixing Resin And Ensuring Clarity
Precision in prep means flawless pours.
- Measure resin and hardener in equal parts on a digital scale
- Stir slowly for two minutes, scraping the sides so nothing sticks
- Tap molds on a flat surface to coax out residual air bubbles
A single drop of fast-acting dye per ounce creates vibrant accents without sacrificing clarity. One maker used pearl pigment for a subtle shimmer that customers can’t get enough of.
Safety first: work in a ventilated area, wear nitrile gloves, and keep alcohol wipes handy to clear surface bubbles before curing.
UV Curing And Finishing Touches
A UV lamp shrinks curing time to minutes. Position molds about two inches from the light source.
- Maintain a 2–3 minute cure cycle for thin pours
- Rotate molds halfway through to ensure even exposure
- Inspect under natural light to spot any uncured patches
Once firm, move from 600 to 1200 grit sandpaper in gentle, circular motions. A final rub with a polishing compound delivers that crystal-clear finish.
Attachment And Presentation
A sturdy ring makes all the difference. Opt for split rings with welded seams, pry them open with pliers, thread through an eyelet or drilled hole, then squeeze shut to lock in place.
Thoughtful packaging turns a simple keychain into a memorable gift. One artisan tucked each piece into a kraft pouch, tied it with twine, and added a handwritten tag—receiving rave reviews for the personal touch.
For a deeper dive on projection charms, check out our guide on creating your own projection charm.
To keep your keychains looking fresh, wash metal parts with a drop of dish soap and a soft brush. Steer clear of harsh solvents that can cloud resin or wear down metal finishes.
With these hands-on techniques, you’ll create personalized keychains that blend sentiment, style, and lasting quality.
Order Photo Projection Keychains Online
If you want that polished, professional look without pulling out your home studio gear, ordering online is a smart choice. Top e-commerce sites let you personalize a projection keychain in just a few clicks.
At first, the customization dashboard might seem overwhelming. Once you get comfortable with the file requirements and preview tools, you’ll breeze through your mockup and have a gift-ready keepsake in no time.
Here’s a peek at what one provider’s dashboard looks like:
You’ll spot a live 3D preview next to resolution checks and format warnings. Adjusting image size before you pay is that easy.
Comparison Of Online Keychain Providers
To help you pick the right service, here’s a side-by-side look at three popular platforms:
| Provider | Customization Options | Price Range | Delivery Time |
|---|---|---|---|
| ShinyProj | 3D Preview, Text Overlay, Gift Box | $25–$45 | 5–7 days |
| LumiKey | Photo Upload, Font Choices, Engraving | $30–$50 | 4–6 days |
| GlowCharm | Projection Style, Color Filters, Rush | $28–$48 | 3–5 days |
That quick snapshot helps you match features with your budget and schedule.
Upload Files And Select Projection Style
Quality starts with a sharp image. Platforms will flag anything under 300 DPI or using the wrong color profile, so you catch issues early.
Preparing your file is simple when you follow this checklist:
- Ensure PNG or JPEG at high resolution.
- Crop precisely to the projection window.
- Play with filters or color tones to suit your theme.
- Limit text overlays to 20 characters for clarity.
- Use the 3D preview to inspect every angle.
“Instant previews cut mockup cycles by 70%, says a veteran seller.
Customize Text And Packaging
A little extra thought here can turn a nice gift into an unforgettable one. Most sites let you pick ribbon hues, box styles, and personalized labels.
Here are packaging ideas that leave a lasting impression:
- Premium kraft box with custom foil stamping
- Clear acrylic case with a velvet insert
- Handwritten thank-you note featuring your image
- Rush assembly and gift wrapping service
- Eco-friendly burlap pouch tied with twine
“Quick packaging tweaks can boost perceived value by 15–20%.”
Don’t forget to review shipping options—some regions ship in as fast as 3 days, others up to 14 days with add-ons.
Manage Production And Approvals
Real-time tracking means fewer surprises. Your dashboard will show estimated completion and shipment dates at a glance.
Speed up approvals with these tips:
- Combine all feedback into one message with clear notes
- Review color proofs in natural light to spot shifts
- Ask for a neutral-background digital sample early
- Schedule two quick review rounds to stay on track
- Use built-in chat to confirm small tweaks instantly
“A recent case study saw a small shop cut production time by 30% using automated updates and batch approvals.”
Once you lock in approvals, complete payment and keep an eye on your tracking link. Soon, a beautifully packaged projection keychain will arrive ready to delight.
Before gifting, test the projection in a dim room with a bright LED. Make sure the image shines sharply through the gem. If you’re handing it over in person, wrap the piece in soft tissue and tuck in a tiny care card.
Order with confidence, inspect your sample, and enjoy premium packaging. Learn more about photo projection jewelry in our unique personalized keepsakes.
Packaging Ideas And Care Tips
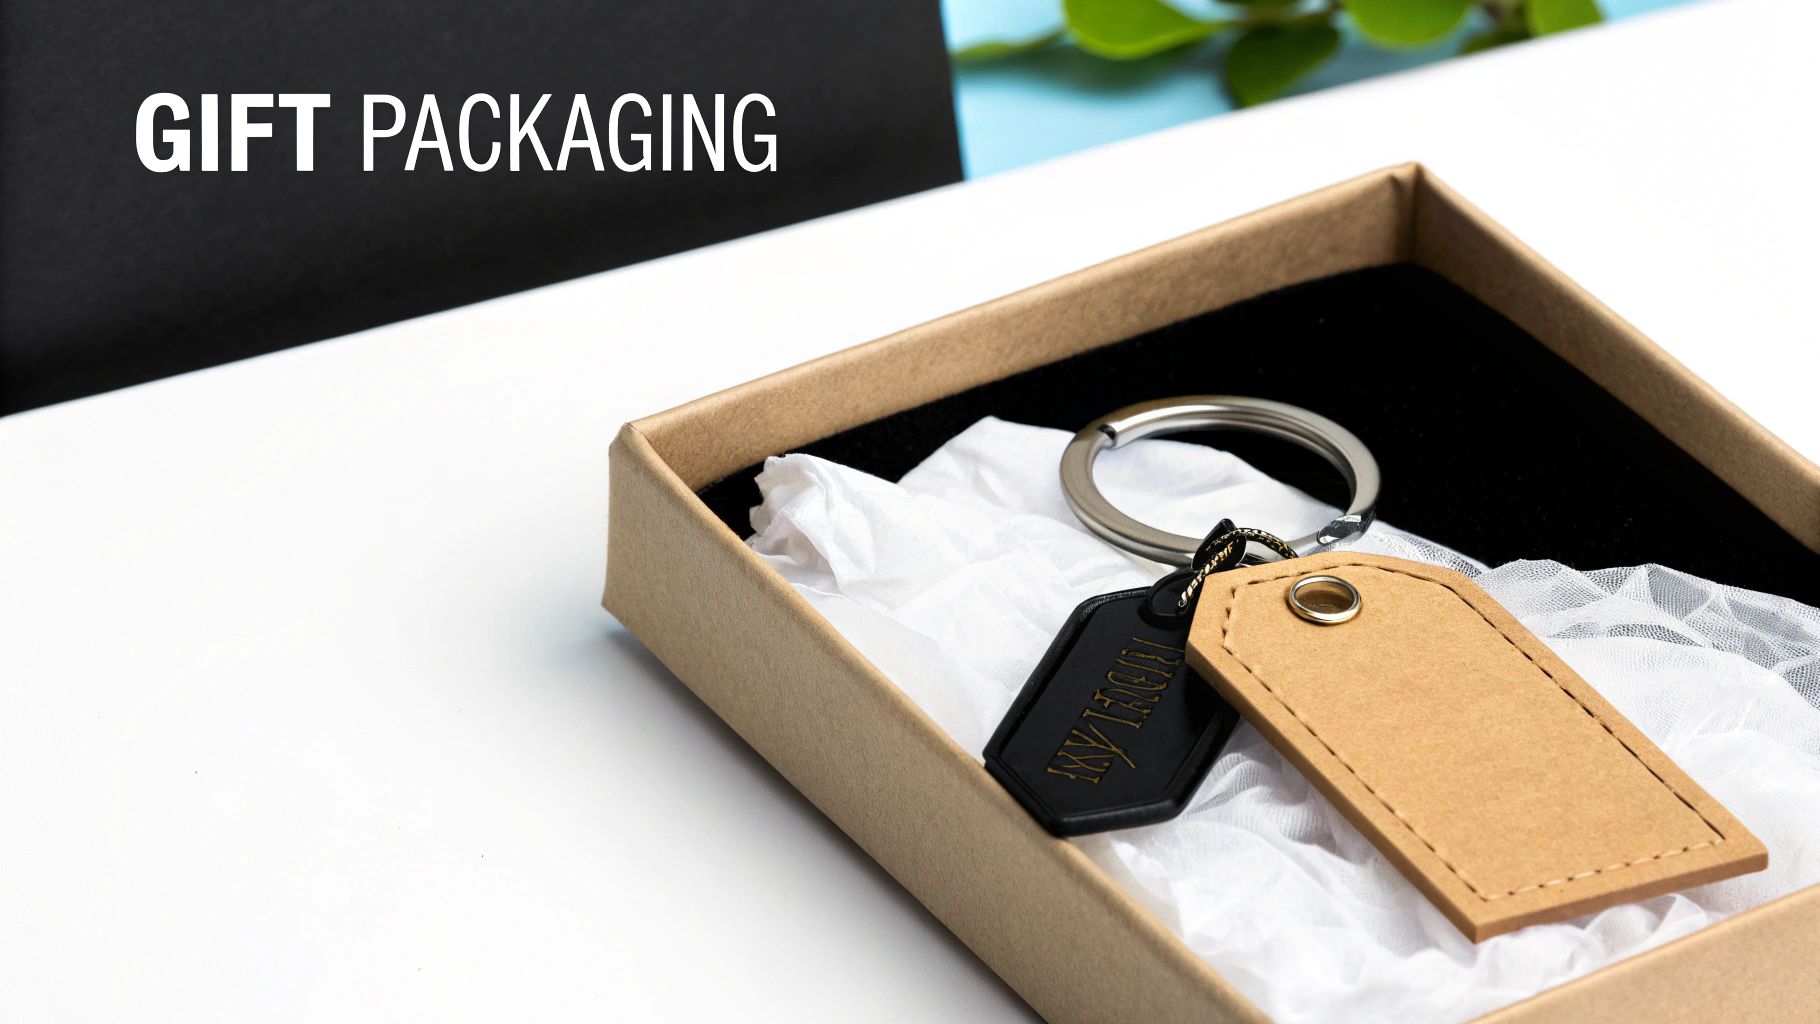
A little extra thought goes a long way when you’re wrapping up a handcrafted keychain. The right box or pouch doesn’t just protect—it tells a story and sets the tone before the gift is even opened.
Think beyond basic mailers. Here are a few packaging styles that make an impression:
-
Kraft Box With Custom Tag
A sturdy, eco-friendly container accented by a handwritten note or logo. It feels warm and personal. -
Clear Acrylic Pouch
Sleek, modern and glossy. Perfect for showcasing vibrant colors without unwrapping. -
Burlap Bag With Twine
Rustic texture meets reusable design—your customers will want to keep this bag. -
Velvet Gift Box
Plush lining cushions the piece and elevates perceived value in one simple package.
Choosing Protective Fillings
It’s surprising how much a few paper shreds can improve transit safety—and brand flair. Lightweight, shredded kraft paper holds items snugly, while colored tissue or crinkle-cut paper adds a playful pop.
Consider layering these extras to make unboxing into an event:
- Divider Card with your logo and a short care note
- Crinkle Paper that wraps around edges for added cushioning
- Ribbon Wrap in satin or jute for a refined finish
- Instruction Card outlining cleaning tips and warranty details
One Etsy seller I spoke with saw customer satisfaction jump by 18% after introducing branded ribbons and clear care cards.
Care Tips For Longevity
Nothing kills a keepsake’s sparkle faster than scratches or tarnish. A gentle routine will keep acrylic components gleaming and metal rings looking fresh.
“A quick weekly polish and proper storage slashes replacement requests—and keeps customers smiling.”
Try these simple steps:
- Rinse acrylic in lukewarm water with mild soap
- Pat dry immediately using a lint-free cloth to avoid spots
- Polish metal rings weekly with an anti-oxidant cloth
- Store keychains in a soft pouch or separate compartment
- Steer clear of harsh chemicals that cloud resin or damage finishes
An independent gift shop owner shared that adding a care card to each order cut replacement inquiries by 30%—proof that a little guidance goes a long way.
Packaging Presentation And Final Touches
Handwritten thank-you notes or tiny themed extras make recipients feel truly valued. Matching your tag font to the keychain’s style keeps everything cohesive. For special occasions like anniversaries or Mother’s Day, drop in a dried flower or a festive sticker.
Here are a few final touches worth trying:
- Seasonal stickers or wax seals for limited editions
- Customized name tags with gold or silver foil stamping
- QR code linking to a short care video or product story
- Mini fabric drawstring pouch in your signature color palette
At the end of the day, thoughtful packaging and clear care instructions turn a simple keychain into a cherished heirloom—one customer will gladly rave about to friends.
FAQ
I’ve lost count of how many times someone’s asked me where durability meets affordability. Each material brings its own strengths and quirks—nothing ever fits every need.
Material Durability And Cost
- Acrylic blanks can run under $1 apiece when you buy wholesale. They’re lightweight and crystal clear but scratch more easily.
- Metal plates—think stainless steel or zinc—cost between $3–$12. They resist bends, tarnish well, and hold crisp engraving.
- Resin molds let you lock in pigments or photos, though they demand a careful pour to avoid mess.
- Multifunction pieces like LED accents or built-in bottle openers carry a premium but stand out in a crowd.
Weigh your priorities—budget, finish, longevity—and you’ll land on the right material every time.
Image Resolution Tips
Tiny designs need razor-sharp clarity. Anything under 300 DPI risks looking soft once shrunk to keychain size.
- Save files at 300 DPI or higher in PNG or SVG.
- Stick with lossless formats to protect edges and transparency.
- Position your crop inside the printable window—don’t let the mold edge sneak in.
- Preview a scaled mockup on your phone to confirm how it reads up close.
- Archive your originals so tweaks or reprints take minutes, not hours.
A quick test run on a scrap blank will catch mismatches before you order a full batch.
Resin Curing And Bubble Control
Under a proper UV lamp, most resins cure in 2–5 minutes. Add one simple move to your routine for fewer flaws.
A gentle tap just before curing can slash bubbles by up to 50%, sparing you endless polishing later.
If you want total peace of mind, choose a slow-cure formula and work in a dust-free zone.
Selling Custom Keychains
Turning your passion into profit is within reach. Just cover your legal bases, price smartly, and pick the right sales channels.
- Register your business and review any trademark rules in your area.
- Factor in material costs, hands-on time, and your target margin.
- Show off your pieces on Instagram, at craft fairs, or through top online marketplaces.
By following these steps, you’ll move from hobbyist to a go-to source for custom treasures.
Ready to explore premium photo projection jewelry? Check out Hidden Forever today and bring your memories to life!