

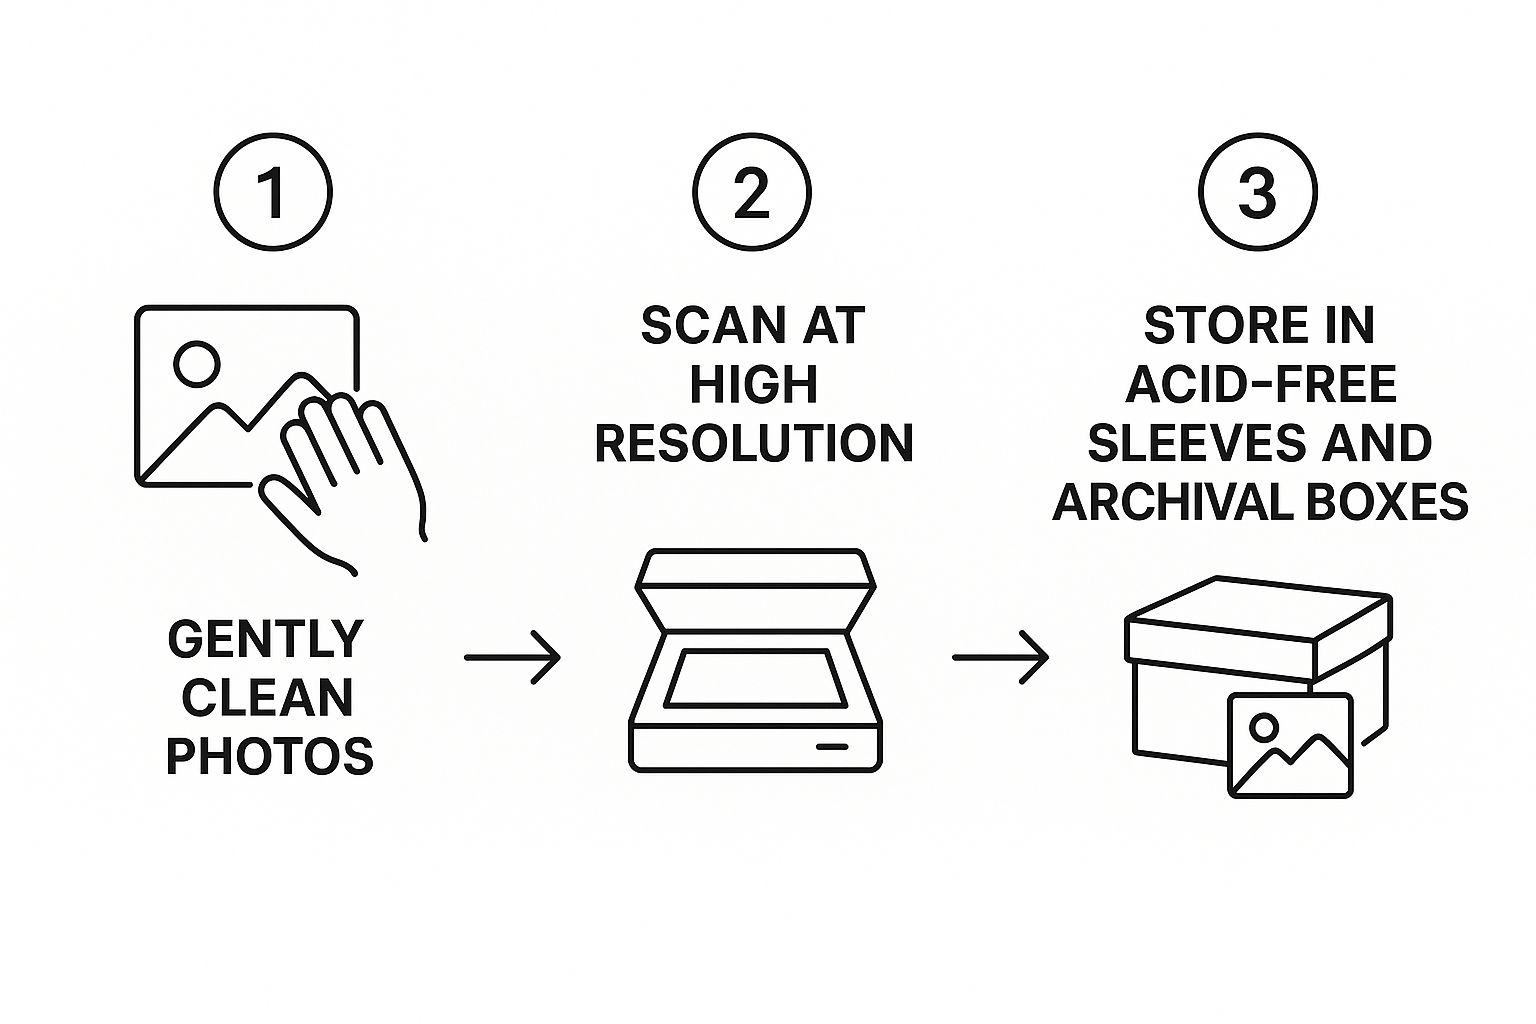
If you’ve ever held a faded, crinkled photograph from a shoebox, you know that preserving these moments comes down to a few critical actions. The secret is to handle them carefully, keep them in a cool, dark, and dry place, and, most importantly, create high-quality digital copies as a lifeline. Following these steps is the best way to shield your irreplaceable prints from the light, humidity, and physical wear that cause them to degrade over time.
Your Starting Point for Photo Preservation
Old photographs are so much more than just paper—they're real, tangible connections to our past. They hold moments that words can’t quite capture: a grandparent’s wedding day, a blurry childhood birthday, a candid family laugh. When you start a preservation project, you’re not just organizing old stuff; you’re ensuring these visual stories survive for your kids and grandkids to discover.
Before you jump into scanning and sorting, it helps to know what you’re up against. Most old photos are surprisingly complex, made of distinct layers: a paper or glass base, a binder like gelatin, and the image itself, often formed from light-sensitive silver. Each layer reacts differently to its environment. If you're curious, you can learn more about the fascinating science behind their conservation.
Your first goal is simple: stop any further damage in its tracks and create a stable home for your collection. You don’t need a fancy lab for this—just a bit of care and a thoughtful approach.
The Foundation of Preservation
Think of this journey as moving along two tracks at the same time: protecting the physical photos and creating digital backups. One secures the original artifact, while the other protects the memory itself from being lost to a fire, flood, or accident. You absolutely need both.
The process of digitizing and storing your photos is more than just a technical chore—it’s an emotional journey. It reconnects you with loved ones and breathes new life into the shared experiences that define your family's history.
To begin, pull everything together. Take an inventory of your collection so you can see the full scope of the project. This will help you decide which photos are the most fragile and need attention first.
To get you started on the right foot, I've put together a quick summary of the most important things to focus on. These are the non-negotiable first steps.
Core Actions for Preserving Your Photos
| Action | Why It Matters | Quick Tip |
|---|---|---|
| Gentle Handling | The natural oils on your skin are acidic and can permanently stain or damage the delicate surface of a photo over decades. | Always handle photos by their edges. Better yet, wear a pair of simple cotton gloves to be completely safe. |
| Controlled Environment | Extreme heat, light, and humidity are the biggest threats. They cause photos to fade, yellow, and become brittle. | An interior closet in a temperature-controlled part of your house is a great spot. Avoid attics and basements at all costs. |
| Archival Materials | Standard cardboard boxes and old "magnetic" albums contain acids that actively break down your photos. | Look for storage boxes and sleeves labeled "acid-free" and "lignin-free". It's a small investment with a huge payoff. |
| Digitization | A high-quality scan acts as your ultimate insurance policy, preserving the image exactly as it is today. | Scan at a resolution of at least 600 DPI. This gives you a file that's versatile enough for both screen viewing and printing. |
Getting these four things right will make the biggest difference in protecting your memories for the long haul. They form the bedrock of a successful preservation project.
Safely Handling and Cleaning Vintage Photos
Before you even start sorting through that old shoebox of memories, let’s talk about the first rule of handling vintage photos: do no harm. I’ve seen too many well-intentioned projects go sideways because of simple, avoidable mistakes. The oils, salts, and microscopic grime on our fingertips are surprisingly acidic and can leave permanent smudges and chemical stains on a photo’s delicate surface.
This is why your absolute first move should be to get a pair of clean, white cotton or nitrile gloves. Seriously, they are the most important tool in your entire preservation kit. They create a simple barrier that prevents the oils from your skin from causing irreversible damage over time. Even with gloves on, always get in the habit of holding prints by their edges to minimize contact.
Once you’ve got your gloves on, find a good workspace. You just need a clean, flat, and well-lit area—a kitchen table with a soft, lint-free cloth thrown over it is perfect. Working in a controlled space like this cuts down the risk of accidental spills, scratches, or other heartbreaking mishaps.
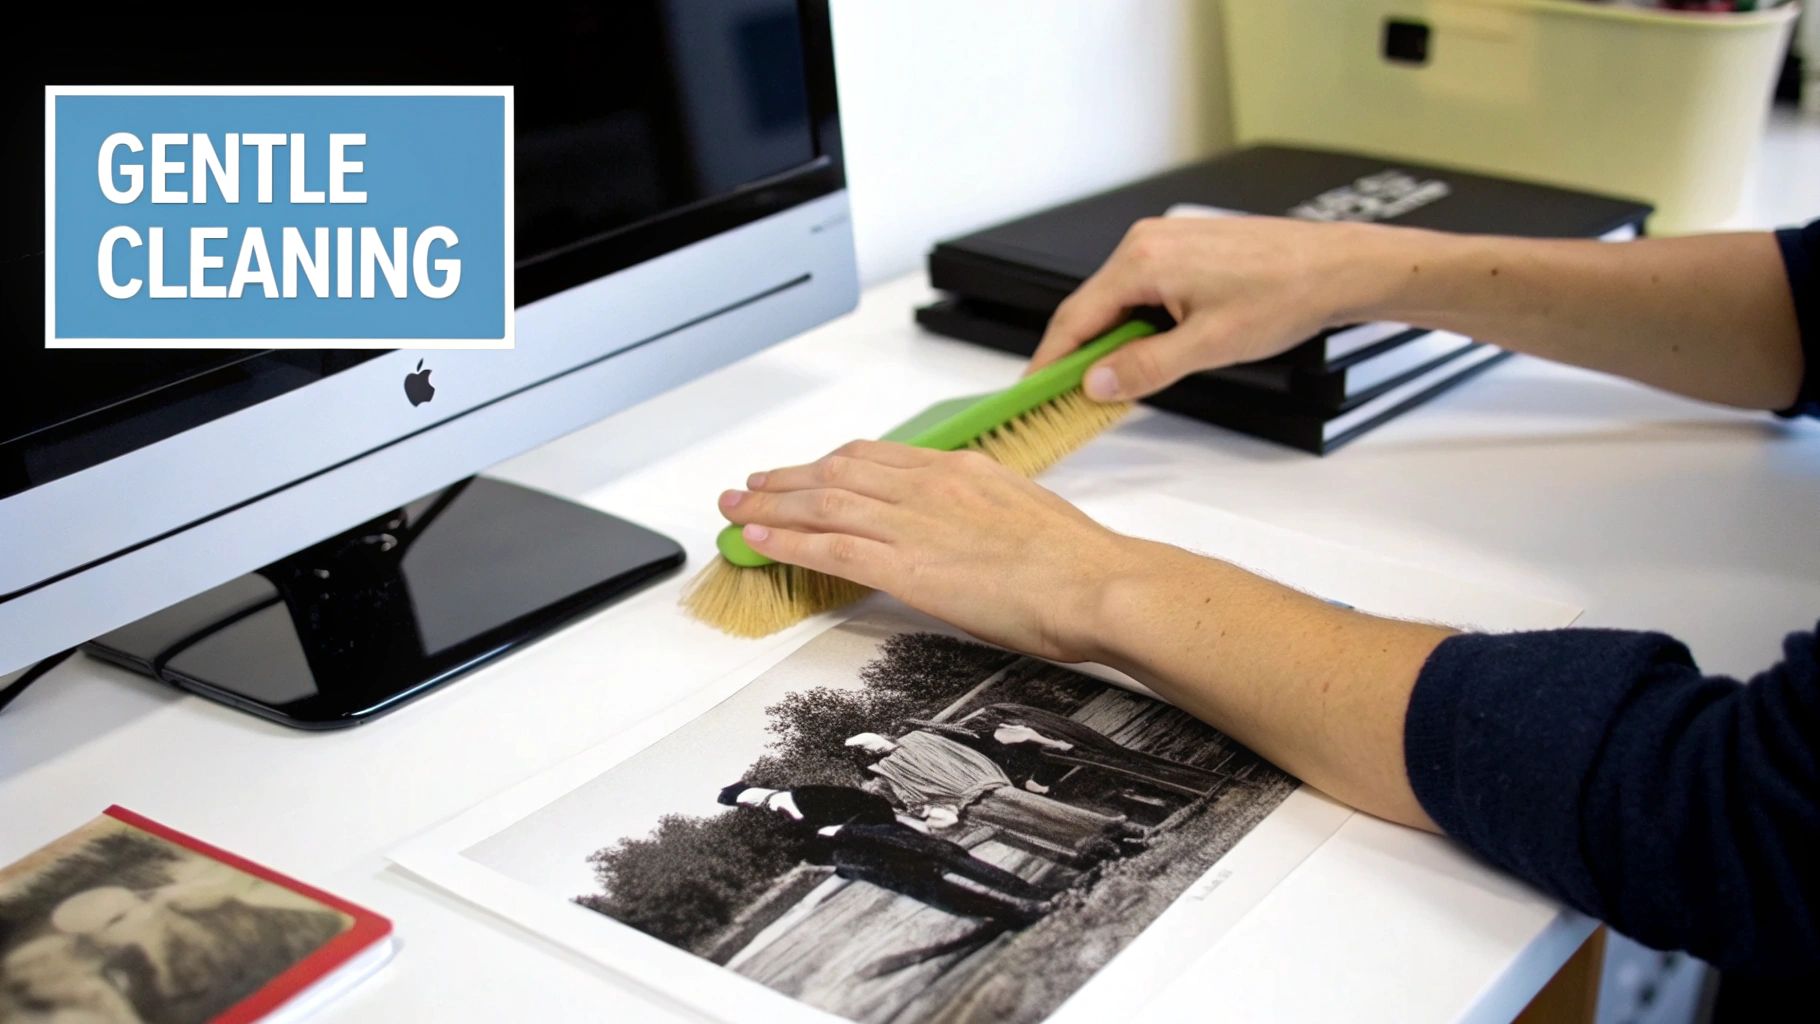
The Gentle Art of Dust Removal
After decades in storage, most photos have picked up a fine layer of dust and loose debris. Gently removing this surface grime is often the only "cleaning" a vintage photo ever needs. The key word here is gently. Going at it too aggressively can be incredibly destructive.
For this job, your best friend is a very soft, natural-bristle brush. Think of the camel hair or squirrel brushes you’d find at an art supply store. A can of compressed air is also a fantastic tool for getting stubborn particles off without ever touching the photo's surface.
Your Basic Cleaning Kit:
- White Cotton or Nitrile Gloves: An absolute must-have to protect photos from your hands.
- Soft, Natural-Bristle Brush: Your go-to for gently sweeping away loose dust without scratching anything.
- Canned Compressed Air: Perfect for blowing away debris from a safe distance. Just be sure to hold the can upright and use short bursts.
When you're ready to clean, hold the photo at a slight angle and lightly brush from the center outwards. This sweeping motion pushes the dirt completely off the print instead of just shuffling it around. If you hit a stubborn spot, a few short puffs of compressed air should do the trick.
A Critical Warning: Never, ever blow on a photograph with your mouth. The moisture from your breath can make the delicate emulsion swell and get sticky, leading to spots and permanent damage. It's a simple mistake that can ruin a priceless photo in seconds.
Common Cleaning Mistakes You Must Avoid
Knowing what not to do is just as crucial as knowing the right way to do things. It’s so tempting to reach for common household items to "clean" an old picture, but this is a critical error that can completely destroy it.
The single biggest mistake I see people make is using water. Water is the absolute enemy of most photographic prints, especially older ones with albumen or gelatin emulsions. It can literally dissolve the binder layer, causing the image to lift, crack, or wash away right before your eyes. The damage is swift and irreversible.
Along the same lines, stay away from all chemical cleaners. Things like Windex, alcohol, soap, or other solvents will strip the image from its paper base, cause massive discoloration, and ruin the photo's structure. There are zero exceptions to this rule.
- NEVER use water or any other liquid on a photograph.
- NEVER use household cleaners, rubbing alcohol, or chemical solvents.
- NEVER try to get rid of marks or stains with a regular pencil eraser.
If you have a photograph that's severely dirty, stained, or even stuck to the glass of an old frame, don't try to be a hero. This is when you call in a professional photo conservator. They have the specialized training and archival-safe materials to handle these complex problems without causing more damage. Sometimes, the most important part of photo preservation is knowing when to ask for an expert's help.
Once your photos are clean and safe, you might start thinking about unique ways to keep them close. For those truly special images, like old wedding portraits, you might be interested in exploring some creative ideas for preserving wedding photos in jewelry.
Choosing the Right Archival Storage for Your Photos
After you've carefully cleaned your old photos, the next big step is finding them a safe, long-term home. This is where many people unknowingly go wrong. The common shoebox or that old "magnetic" photo album might feel like a safe bet, but they're often the biggest culprits in damaging your precious memories over time.
Think of it this way: those everyday containers are usually loaded with acids and a chemical called lignin. Lignin is a natural polymer in wood pulp that breaks down, releases acid, and leaches directly into your photos. This process is what causes them to turn yellow, become brittle, and eventually fall apart. You need to get your prints out of there and into true archival-quality materials.
Learning the Lingo: What "Archival Quality" Really Means
When you start shopping for proper photo storage, you'll run into two key terms: "acid-free" and "lignin-free." They aren't just marketing fluff; they are critical for preservation.
- Acid-Free: This is your baseline. It means the material has a neutral pH of about 7.0 or is slightly alkaline. This prevents acid from migrating onto your photos and causing chemical decay.
- Lignin-Free: This is the upgrade you really want. A material can start out acid-free, but if it contains lignin, it will create its own acid as it ages. Lignin-free materials ensure your storage containers won't become the source of the problem down the road.
The gold standard for protecting your photos is using materials that are certified both acid-free and lignin-free. It's a non-negotiable detail that makes a huge difference in whether your photos survive for another generation.
Building Your Physical Storage System
A smart storage strategy uses layers of protection—think individual sleeves inside larger, sturdy boxes. This approach shields each photo from sticking, dust, and fingerprints while providing a secure shell for the whole collection.
Individual Enclosures
First, every single photograph deserves its own sleeve. This is non-negotiable. It stops them from rubbing or sticking together and provides a barrier against scratches and oils from your hands.
Your best bet is polyester (Mylar) sleeves. This material is chemically inert, so it won’t react with your photos over time. Plus, it's crystal clear, which is perfect for viewing a photo without having to constantly remove it from its protective sleeve. If you're on a tighter budget, polypropylene sleeves are another widely accepted safe alternative.
Boxes and Bins
Once sleeved, your photos need a container. Look for archival-quality boxes made from acid-free and lignin-free board. They come in all shapes and sizes, so you can find a box that fits your collection snugly, which is important for preventing photos from sliding around and getting bent.
For example, if you have a hundred 4x6 prints, the ideal setup is to place each one into its own polyester sleeve. Then, you'd stack them vertically in a matching 4x6 acid-free box, maybe using an archival spacer to keep them upright and snug.
Finding the Perfect Storage Environment in Your Home
Even the best archival boxes can’t fully protect your photos from a hostile environment. Attics and basements are the absolute worst places you can store photographs. The wild swings in temperature and humidity in these spaces will accelerate their decay.
You're looking for a spot that is cool, dark, and dry. For most of us, this means an interior closet in a main living area or a shelf in a guest room. These locations are far more stable than attics, garages, or basements.
Professional conservators work hard to create controlled environments, aiming for a relative humidity around 30-40% and a consistent temperature of about 65-70°F (18-20°C). This slows down the chemical reactions that make photos fade and degrade. While you might not have a climate-controlled vault, you can get close by simply choosing the most stable spot in your house. You can learn more about how different photo types require specific handling from professional conservation resources.
If you live in a very humid area, tossing a few silica gel packets into your storage boxes can help absorb any extra moisture. In the end, creating a safe physical space for your photos comes down to a simple formula: the right materials in the right location.
Digitizing Your Collection for the Future
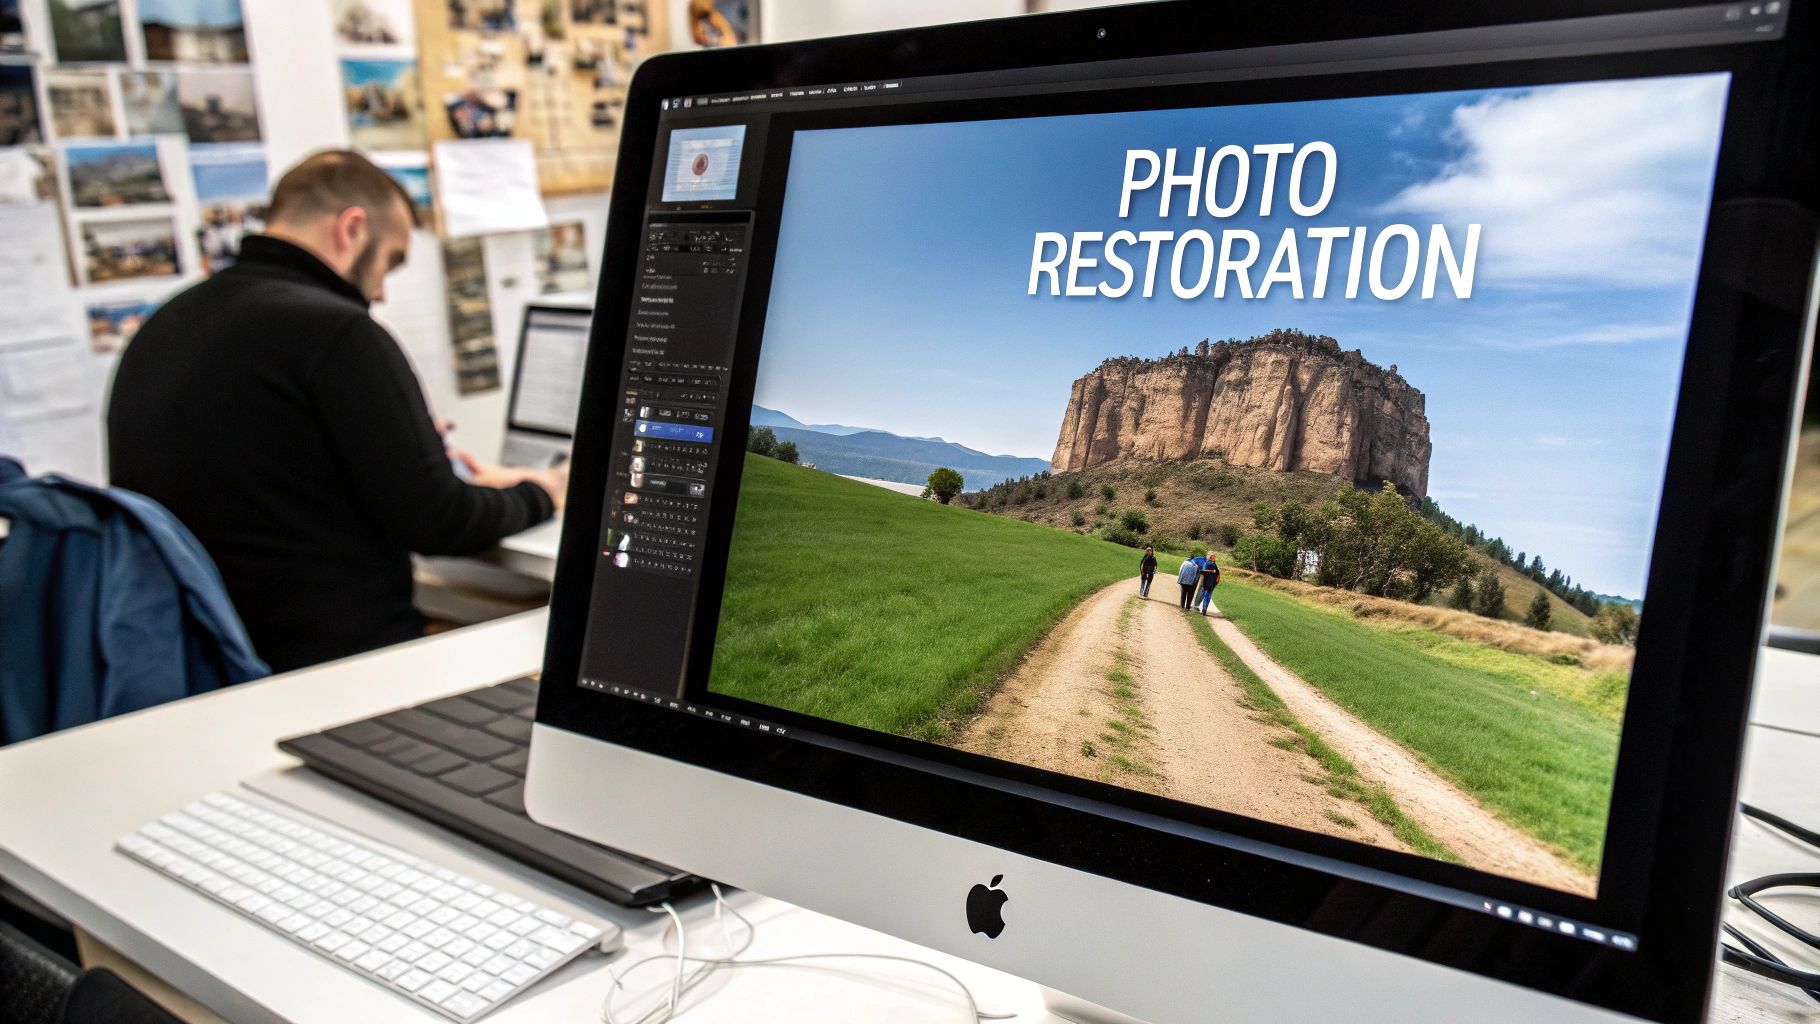
Think of creating digital copies of your old photos as the ultimate insurance policy. While you're taking great care of the physical prints, a high-quality digital archive is what truly protects those memories from fire, floods, or even just a clumsy accident. It's how you build a future-proof legacy.
The good news is that this process is more accessible than ever. But the choices you make—from the scanner you use to the file type you save—have a huge impact on the final quality and longevity of your digital collection. It's worth getting it right.
This guide breaks down the essential workflow, from a gentle pre-scan cleaning to the final, safe archival storage.
The main thing to remember is that proper digitization is a deliberate process, not just hitting "scan" on a whim. Every step builds on the last to create a final product you can be proud of for years to come.
Choosing Your Digitization Method
So, how do you actually turn those paper prints into digital files? You've got two main paths: you can do it yourself, or you can hire a professional service. There’s no single "best" answer here; the right choice really boils down to your budget, how much time you have, and the sheer volume of photos you're tackling.
A breakdown of different ways to digitize old photos, helping you choose the best option for your needs and budget.
Comparing Photo Digitization Methods
| Method | Best For | Pros | Cons |
|---|---|---|---|
| DIY Flatbed Scanner | Small to medium collections; having full control over quality and details. | Total control over settings; lower upfront cost if you already own a scanner. | Extremely time-consuming; requires technical know-how for best results. |
| Professional Service | Large collections (hundreds or thousands of photos); when you're short on time. | Very fast and efficient; consistent, high-quality results from specialized equipment. | Higher cost; less personal control over the scanning process. |
| Photo Scanning App | Quick, casual sharing; when quality isn't the top priority. | Convenient and fast for a few photos; uses the phone you already have. | Lower resolution; prone to glare and distortion; not for archival quality. |
Ultimately, whether you scan them yourself or send them out, the goal is to get a high-quality digital version you can work with.
Going the DIY route gives you complete control. For most people, this means using a good-quality flatbed scanner. It's perfect if your collection is manageable or if you're a perfectionist who wants to get every single detail just right. The same principles of careful handling apply here as they do in other preservation work, like what you'd find in a guide to photographing antiques.
On the other hand, professional digitization services are a lifesaver for massive collections or if you just don't have the time or technical confidence. These companies use specialized, high-speed gear to churn through thousands of photos. It costs more, but it saves an incredible amount of time and usually delivers very consistent, high-quality scans.
Mastering Your Scanner Settings
If you’ve decided to scan the photos yourself, don't just accept the default settings! Taking a minute to dial in your scanner's software is the secret to creating a fantastic digital archive.
Here’s what you need to focus on:
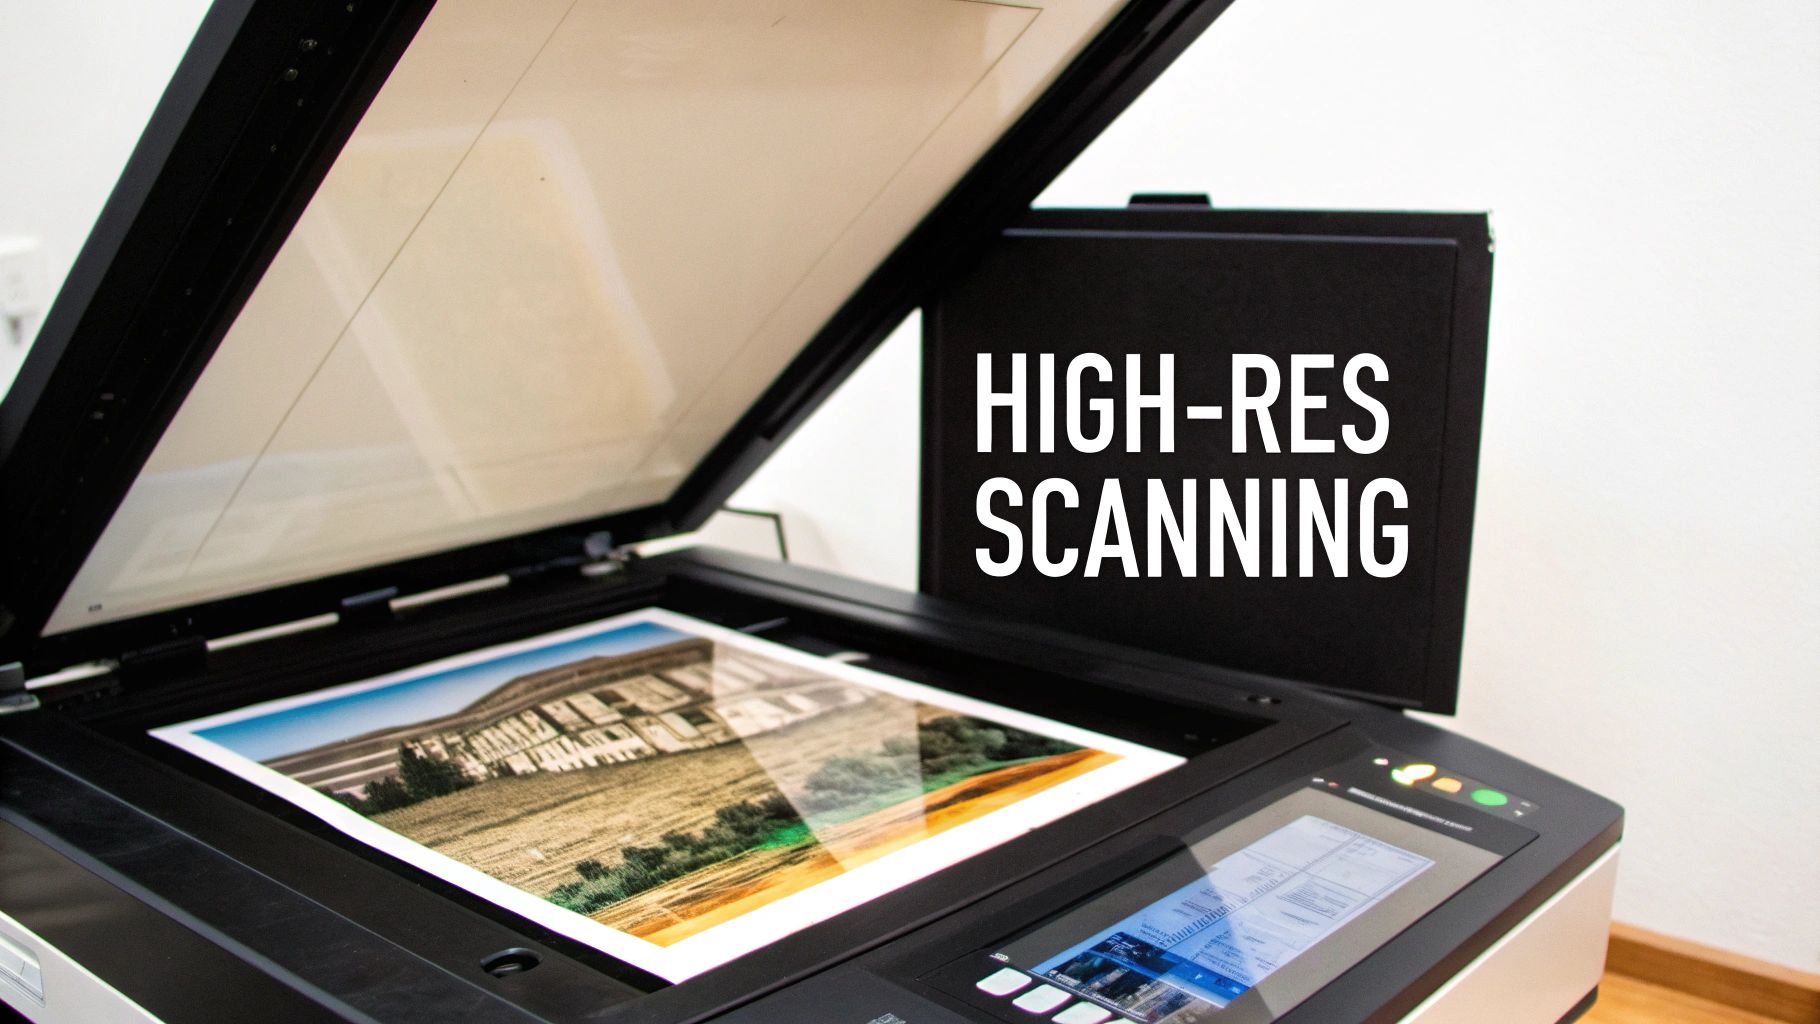
- Resolution (DPI): This is the big one. For most standard prints (like a 4x6), a resolution of at least 600 DPI (dots per inch) is your baseline. If you're scanning something small, like a wallet-sized photo, or if you think you might want to print a large enlargement later, bump it up to 1200 DPI.
- File Format: Your main choices are TIFF and JPEG. TIFF (.tif) is what the pros use for archiving. It’s a “lossless” format, meaning it saves every bit of image data without compression. JPEG (.jpg) files are much smaller, but they achieve this by compressing the file, which sacrifices a little bit of quality.
- Color Depth: Always scan in full color, even for your black-and-white photos. Why? A 24-bit color depth will capture all the subtle, rich tones in sepia or faded monochrome prints that a simple grayscale scan would completely miss.
Pro Tip: My workflow is always the same: I scan everything as a TIFF. This becomes my "digital master" or "digital negative"—the pristine archival copy I never touch. From that master file, I'll save smaller JPEG copies that are perfect for emailing to family or posting online, without ever risking the original scan.
The Long-Term View on Digital Files
Once your photos are scanned, the job isn't quite finished. A folder packed with files named "IMG_2056.tif" is a digital junk drawer. You need a system.
Start a logical naming convention right away. A simple format like YYYY-MM-DD_Event-Description_001.tif can make your entire collection searchable in an instant. For example: 1965-08-15_Grandmas-Wedding_001.tif. It seems like a small thing, but you’ll thank yourself later.
Scanning gives us amazing access and protection, but it’s not a magic bullet. Digital files have their own vulnerabilities. Archivists worry about file formats becoming obsolete and storage media failing over time. Your digital collection is only as safe as its backups.
This is why a solid backup strategy, which we’ll cover next, is non-negotiable. The bonus of all this work? Having these digital files opens up a world of new ways to enjoy old memories. For a truly modern twist on keeping a photo close, you might be interested in seeing how photo projection jewelry and how it creates a personalized keepsake.
Building Your Long-Term Preservation Plan
https://www.youtube.com/embed/FmtQJHJ17xs
Real preservation isn't a project you finish once and forget about; it’s an ongoing commitment. Now that you've carefully handled, cleaned, and digitized your precious photos, the final piece of the puzzle is weaving those physical and digital efforts into a strategy that lasts. This is how you guarantee your family's history truly endures.
You don't need a high-tech, museum-grade facility to pull this off. The core principles that major institutions rely on can be easily adapted for your own personal collection. It's really just about being methodical and proactive. A little planning now will save you a world of heartache down the road and keep your memories alive and accessible for generations.
Create a Simple Photo Inventory
Before you pack everything away for safekeeping, taking a moment to create a simple inventory is a total game-changer. I promise this doesn't need to be some complicated, time-consuming task. A basic spreadsheet or even a dedicated notebook will do the trick perfectly.
For each album or storage box, just jot down a few key details:
- A brief description: Something like, "Childhood photos from the 1970s" or "Grandma Helen's wedding album."
- The date range: Even an estimate helps, like "Approx. 1970-1979."
- Key people or events: For example, "Johnson family, birthdays, holidays."
- Physical location: Be specific! "Top shelf, guest room closet."
This simple catalog transforms a stack of mystery boxes into an organized, searchable archive. Years from now, when you're looking for that one specific photo, you'll know exactly where to find it.
This is the same fundamental approach professional archives use. For a huge project protecting rare photographs, Harvard University's first move was to create a comprehensive catalog to track every single item. Only after digitizing were the original prints moved to secure, climate-controlled storage. While you don't need to get that detailed, you can see their methodology and apply the same logic.
What you'll notice is the incredible detail professionals use, tracking everything from photo type to condition before they even think about preservation. The key takeaway for the rest of us is the importance of having a system—knowing what you have and where it is.
The 3-2-1 Rule for Digital Safety
Your digital files are only as safe as your backup system. A single hard drive is just a single point of failure waiting to happen. To truly shield your digital scans from hard drive crashes, accidents, or even cyber threats, you need to adopt the widely accepted 3-2-1 backup rule.
The 3-2-1 Rule: Have three copies of your data. Store them on two different types of media. Keep one copy off-site.
This is way easier to implement than it sounds. Here’s a real-world example:
- Copy 1: The "live" files on your computer's main hard drive.
- Copy 2: A backup on a separate physical device, like an external hard drive.
- Copy 3: A backup stored in a completely different location. This could be a cloud storage service like Google Drive or Dropbox, or even a second external drive you keep at a trusted friend's house.
This level of redundancy protects you from pretty much any disaster you can imagine. If your computer dies, you've got the external drive. If a house fire destroys both of them, your off-site copy is safe and sound.
Planning for the Future of Technology
Digital preservation means you have to think ahead. Technology evolves, file formats can become obsolete, and storage devices eventually degrade. Your long-term strategy needs to include a simple, recurring check-in.
I recommend setting a calendar reminder to review your digital archive every 3-5 years. During this check-up, you'll want to do two key things:
- Check File Integrity: Open a few random files from different folders in your archive to make sure they haven't been corrupted over time.
- Migrate to New Media: If your backup drives are getting old or cloud technology has changed significantly, it's time to move your entire collection to new, modern storage. This is a proactive step that prevents "digital obsolescence."
As you build out this plan, it helps to remember the powerful emotional value behind these photos, much like the practice of preserving cherished memories through tangible items. This reinforces the "why" behind all your hard work. You might even find that some images are perfect candidates for truly unique gifts. For some great ideas, you can explore the top occasions for gifting photo memory jewelry.
Answering Your Top Photo Preservation Questions
Once you start digging into a box of old family photos, the questions start popping up. It's totally normal. You want to make sure you're doing right by these irreplaceable memories. I get asked these questions all the time, so let's walk through the most common ones to get you the clear answers you need.
Think of this as a conversation about the nitty-gritty details. Getting these things right is what separates a well-preserved collection from one that degrades over time.
How Should I Handle Curled or Brittle Photos?
We've all seen them—photos that have curled up into a tight roll after decades in a box. Your gut reaction is probably to just unroll it. Don't do it! Forcing a curled or brittle photo flat is a surefire way to crack the delicate image layer, causing permanent damage.
The key is patience. You need to gently reintroduce a little humidity to make the photo pliable again. You can create a simple humidification chamber right at home. Just place the photo on a small wire rack inside a large plastic tub with a lid. Next to the rack, place a damp sponge, but make absolutely sure no water can touch the photograph itself.
Seal the container and let it sit for a few hours. The moist air will slowly relax the paper fibers. Once it has flattened out on its own, carefully place it between two sheets of archival blotter paper and put a light, even weight on top—a couple of books will do the trick. Check it every day or so. This slow-and-steady method is the only professional-approved way to safely flatten a fragile print.
Should I Take Photos Out of Old Albums?
This is a tricky one, and the answer really comes down to the album itself. If you're dealing with one of those "magnetic" albums from the 70s or 80s—the ones with the sticky cardboard pages and a plastic overlay—the answer is a resounding yes. Those albums are full of acid and the adhesive is literally eating away at your photos.
Here’s how to get them out safely:
- Start by gently trying to lift a corner with something thin and non-abrasive, like a plastic micro-spatula or even a piece of unwaxed dental floss slid underneath.
- If you feel resistance, stop. A little bit of indirect heat from a hairdryer on its lowest setting, held several inches away, can sometimes soften the old glue enough to release the print.
- Patience is everything. If a photo is well and truly stuck, your best bet is to scan the entire page. It's far better to have a high-quality scan of the photo on the page than to risk ripping the original to shreds.
For older paper albums where photos are held in by paper corners, you can usually lift them out carefully with minimal risk.
"The act of digitizing old photos is not merely a technical task; it's an emotional journey. It's a way to reconnect with loved ones, reviving the laughter, the love, and the shared experiences that define our familial bonds."
This really puts it into perspective. Every choice you make, including carefully liberating a photo from a damaging album, is a meaningful step in connecting with your family's story.
Can I Write on the Back of My Photos?
It feels so natural to just grab a pen and jot down names and dates on the back of a print, but this is one of the most common ways people accidentally ruin their photos. Ink from ballpoint or felt-tip pens can bleed through to the front over time, and the pressure from writing can leave permanent impressions on the image.
If you absolutely must write on the original, the only safe tool is a soft graphite pencil (a standard #2 will do). Write very lightly on a back corner, preferably in an area with little detail on the front.
A much better approach? Write the information on the acid-free sleeve or archival folder where you plan to store the photo. This keeps the history with the image without risking the print itself.
Honestly, the best long-term strategy is to embed this information directly into the digital file as metadata when you scan your collection. By adding names, dates, and stories to the digital file, you ensure that context is permanently linked to the image, no matter where it goes. It's the modern, risk-free way to keep the stories alive.
At Hidden Forever, we believe the best memories are the ones you can carry with you. Once your precious family photos are preserved and digitized, why not transform one into a stunning piece of projection jewelry? It's a beautiful way to keep your history close to your heart. Discover our collection of handcrafted keepsakes at hiddenforever.com and turn your favorite photo into a timeless treasure.